• Skip to primary navigation
  • Skip to main content
  • Skip to primary sidebar
  • Recipes
    • Breakfast
    • Drinks
    • Lunch
    • Dinner
    • Salads and Sides
    • Sauces & Dips
    • Vegetarian
    • Dessert
  • About Me
  • Batch Cooking For Beginners
  • Weekly Batch Cooking

Fancy Without the Fuss logo

May 25, 2020

Harissa Chickpea Skillet with Eggplant and Mushrooms

Share
Pin32
32 Shares
Jump to Recipe Print Recipe

I've been challenging myself to eat less meat lately, and this harissa chickpea skillet makes it so easy! The meatiness of the eggplant and mushrooms paired with some kick from the harissa paste (watch out!) make for a super flavorful and satisfying meal. As an added bonus, the flavors are even better the next day, so it's perfect for vegetarian meal prep.

ingredients to make harissa chickpea skillet

What is harissa?

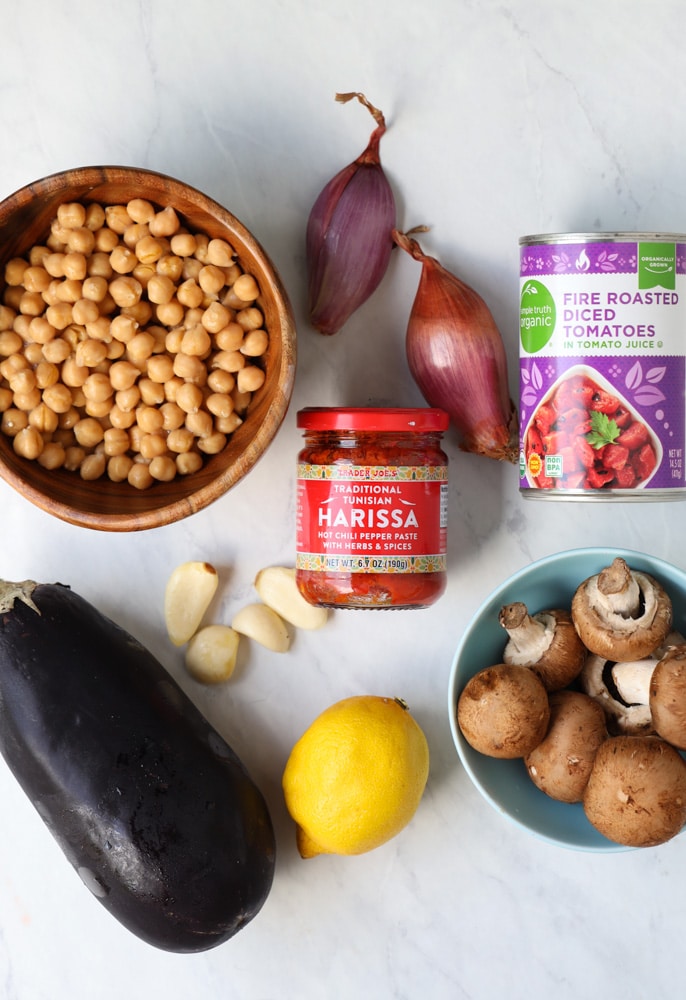
If you've never heard of harissa before, prepare yourself for a flavor explosion! It's a paste made from hot red chilis, garlic, coriander, caraway and cumin, found commonly in North African cooking. It's still a bit of a boutique item, but I've had good luck with the Trader Joe's version (god bless TJ's!). Consider yourself warned though, it has some serious spice that will light your tastebuds on fire in the most delicious way.

If you're not into spicy foods, I'd recommend halving the amount in the recipe. You can always taste at the end and add more if you can tolerate it. Another totally acceptable substitution would be to use tomato paste with a ¼ teaspoon each of ground cumin, coriander and caraway.

meal prep container with harissa chickpeas, kale and brown rice

how to meal prep this Harissa Chickpea skillet

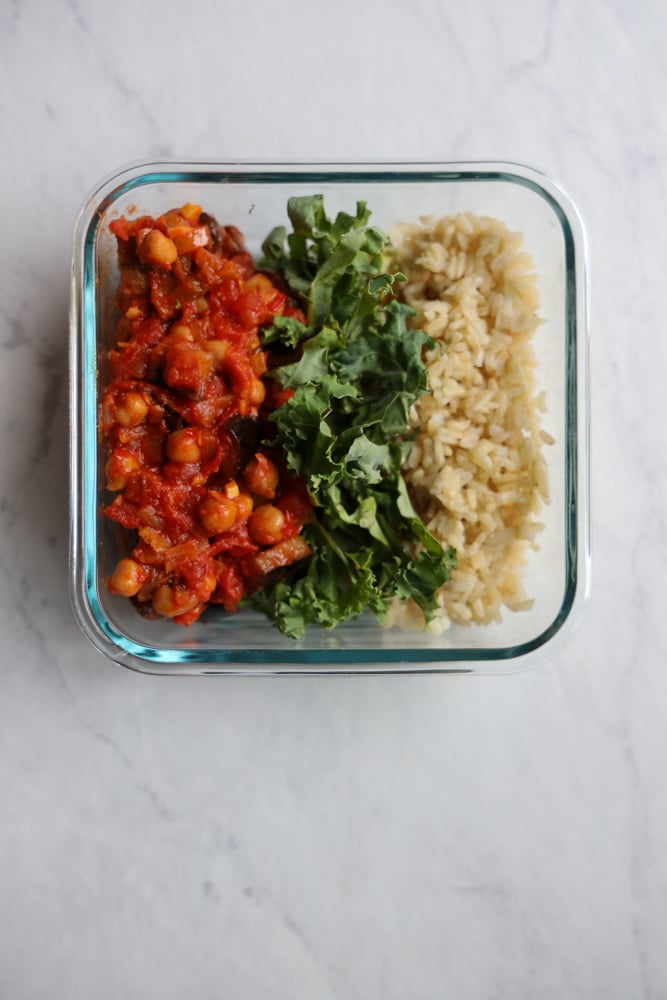
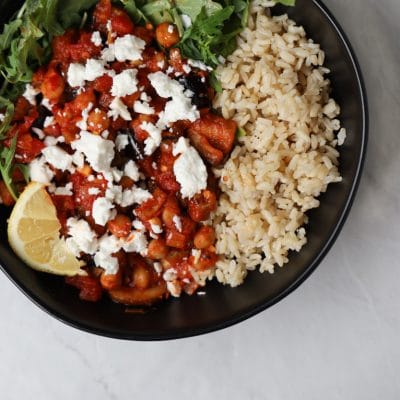
Like a good curry or chili, the flavors are even better the next day, making it perfect to meal prep for lunch. I like to serve mine with a side of brown rice or quinoa to help soak up the delicious sauce, but pita bread would also be great. I'm always trying to sneak more greens into my diet, and I found that kale, spinach, and arugula all work lovely with the flavors here.

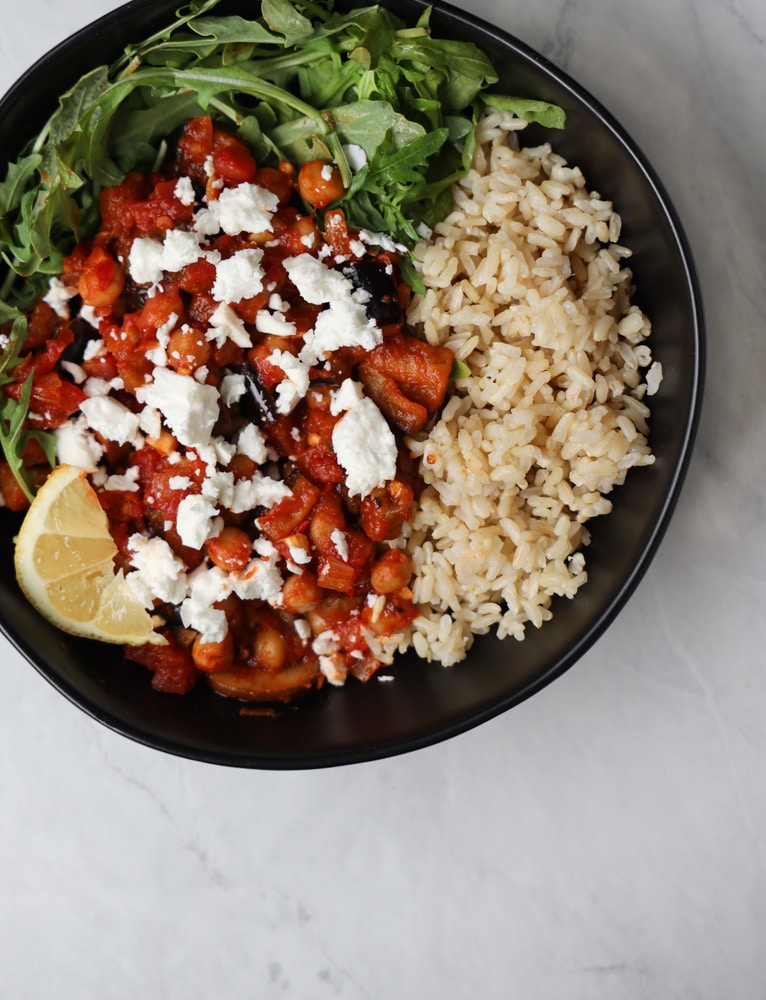
Can you freeze it? You bet! As long as you're making it, might as well bust out a double batch so you can keep some on hand for the future. If you're a cheese lover like me, do yourself a favor and top it with a little crumbled feta while you're at it.

harissa chickpeas in a bowl with brown rice and arugula

KEY POINTERS FOR MAKING THIS RECIPE LIKE A PRO

There are a few things to point out that will help you execute this recipe like a true pro.

  • With eggplant, it's important to salt it ahead of time in order to remove some of the bitter flavor and also so it absorbs less oil during cooking. It seems like an excessive amount of salt but keep in mind you'll give it a quick rinse before sautéing. You don't need to peel the eggplant either FYI.
  • Not an eggplant or mushroom fan? No worries! Try cauliflower, bell peppers or zucchini instead! Think cilantro tastes like soap? Parsley or basil would shine in this recipe.
  • Just like with mushrooms, don't overcrowd the pan when sautéing the eggplant. If your pan isn't quite big enough, it may take two batches the properly caramelize them.
  • Don't skip adding the lemon juice and fresh herbs at the end. They are what make all the flavors sing!
bowl with harissa chickpeas, brown rice and arugula

Harissa Chickpea Skillet with Eggplant and Mushrooms

Harissa is a heavyweight in the spice category, and it brings this vegetarian skillet to life! Made with mostly pantry items, and vegetables that are easily interchangeable, this recipe is sure to make it into your regular meal prep rotation.
0 from 0 votes
Print Recipe Pin Recipe
Prep Time 10 mins
Cook Time 20 mins
Resting Time 30 mins
Course Main Course, vegetarian
Cuisine north african
Servings 6

Ingredients
  

  • 1 whole eggplant
  • 2 tablespoon kosher salt, divided
  • ¼ cup olive oil
  • 1 cup sliced cremini mushrooms
  • 2 whole shallots, diced
  • 4 cloves garlic, minced
  • 1 tablespoon harissa paste
  • 1 teaspoon ground cumin
  • 1 12 oz can chickpeas
  • 1 12 oz can fired roasted crushed or diced tomatoes
  • 1 cup vegetable stock
  • 1 teaspoon lemon juice
  • 2 tablespoon cilantro, chopped
  • ¼ cup feta cheese for serving (optional)

Instructions
 

  • Cut off the stem of the eggplant and cut into ¾ inch cubes. Plae them in a colander in the sink and season them with 1 tablespoon of the kosher salt. Let sit for at least 30 minutes.
  • After 30 minutes, rinse the salt off the cubed eggplant and dry thoroughly with a towel.
  • Heat a wide skillet over medium heat with ¼ cup of olive oil or avocado oil.
  • Working in batches, saute the eggplant til golden brown, taking care not to overcrowd the pan. Remove from pan and place on a plate lined with a paper towel to absorb any excess oil.
  • If needed, add another tablespoon of oil to the pan, and add the shallots and mushrooms. Saute until both are lightly browned, about 5-7 minutes.
  • Add minced garlic and saute just until fragrant, about 1 minute.
  • Add the harissa paste, cumin, remaining 1 tablespoon of salt, chickpeas, and cooked eggplant to the pan. Stir until paste and spices coat the ingredients evenly.
  • Add the canned tomatoes and vegetable stock to the pan and reduce heat to medium low. Simmer for 8-10 minutes until the stock has reduced and you have a thick sauce.
  • Taste for seasoning and add extra salt or harissa if needed. Remove from heat and stir in lemon juice and fresh chopped cilantro to serve.

Notes

  • If freezing, make sure to let the ingredients completely cool before transferring to a container with lid or ziplock and freezing.  
  • Serve with a side of quinoa, rice or cauliflower rice and greens such as kale or spinach.  Top with feta or goat cheese.
  • Without cheese, this dish is vegan and gluten-free.  Just be sure and check your harissa paste to make sure it's GF as well.  
Keyword chickpea, eggplant, harissa, meal prep, north african, skillet, vegetarian
Tried this recipe?Let us know how it was!
Share
Pin32
32 Shares

Filed Under: Dinner, Vegetarian

Reader Interactions

Leave a Reply Cancel reply

You must be logged in to post a comment.

Primary Sidebar

Katie Clack

fancywithoutthefuss

It looks fancy, but it’s secretly the easiest br It looks fancy, but it’s secretly the easiest brunch ever 😏. Just let the blender do all the work for you! 
This Dutch Baby pancake makes magic in the oven and puffs up like a dream—just top with fresh berries and some edible flowers for major wow factor 🍽️✨

Sign up for my weekly newsletter and you’ll get a free download of my summer cookbook where you can find this full Dutch baby recipe!
#FancyWithoutTheFuss #Effortlessentertaining #DutchBaby #Brunchgoals #brunchrecipe #castironcooking #breakfastrecipes #prettyfoodtastesbetter
Since you can never have enough summer salad recip Since you can never have enough summer salad recipes in your back pocket, here’s one more for ya! 🥗My kale Caesar with addictive everything bagel croutons and flakey everything but the bagel salmon. 😮‍💨. I could honestly eat this every day! That kale makes it so hearty and store-bought Caesar dressing is your best friend for weeknight ease.  Give it a go tonight! 

#salmonrecipe #salmonrecipes #ebtb #bagelporn #summersalad #summersalads #summerrecipe #healthyrecipes #healthyrecipeideas #seafoodrecipes #weeknightdinner #weeknightmeals #weeknightcooking #saladsofinstagram #healthysalads 

1/2 lb salmon filets, bones removed
6 cups shredded kale
1 everything bagel, cubed
1 avocado, sliced
1 tbsp everything but the bagel seasoning, divided
1/3 cup caesar dressing
2 tbsp olive oil
1/3 cup shaved or shredded parmesan
1 tsp olive oil
INSTRUCTIONS
 
•Preheat oven to 400 degrees F
•Toss cubed everything bagel with 2tbsp olive oil and 2 tsp of everything but the bagel seasoning. Spread onto a sheet pan and bake for 10-12 minutes, rotating the pan and giving it a little shake halfway through.
•Bake until golden crown and crunchy throughout with no softness in the center of the cubes.
•Spread a teaspoon of olive oil onto the salmon filet. Sprinkle the remaining 1 tsp of everything but the bagel seasoning over the top of the salmon. 
•Bake at 400 degrees for 8-10 minutes or until cooked to your liking.
Depending on the thickness of your filet, 8 minutes should cook through to medium rare. To be cooked well done, it will take closer to 10-12 minutes.
•While the salmon and the croutons cook, put the shredded kale into a bowl. Drizzle over the caesar dressing and massage it into the kale using your hands.
Massage well for 1 minute and then left the kale rest for 5-10 minutes while the items in the oven finish cooking.
Assemble salad by dividing kale into two bowls. Place a salmon filet on the top of each and scatter around croutons. Shave or grate parmesan over the top. Place sliced avocado around and serve with a fresh lemon wedge.
THE big batch drink of the summer for all your bbq THE big batch drink of the summer for all your bbq, bridal shower, birthday party or beach picnic gatherings!  It is so incredibly refreshing and light but has a tendency to sneak up on you so pace yourself and make sure you enjoy it with a heaping plate of food! 🥂

Blend together 1 1/2 cups halved fresh strawberries and 1/4 cup Fresca until smooth.  In a pitcher, add your strawberry puree, 1 bottle of rose, 1/2 cup vodka, 1/2 cup sliced strawberries, 1/2 cup fresh raspberries, 1 sliced lemon, the juice of 1 lemon, and 1 cup fresca.  Stir together.  Add ice to your glass and fill with sangria, leaving room at the top for a little floater of fresca or soda water to serve.  Garnish with edible flowers such as chamomile, violas or pansies. 
#sangria #sangría #sangria🍷 #rosé #batchcocktail #boozy #summerdrink #summerdrinks #summercocktails #summercocktail #cocktailrecipes #cocktailrecipe #summerrecipes #cocktaillovers
These jalapeño corn fritters are my son’s favor These jalapeño corn fritters are my son’s favorite dish I make and they will be yours too! They are the perfect side dish for salmon, chicken, steak, you name it! 🌽. Sweet corn packed with fresh herbs, cheddar and hint of heat.  Did I mention how easy they are?! There’s nothing better! 🤌🏻

Jalapeno Corn Fritters

3 ears of corn kernels (~2 cups)
1 shallot, minced (~1/4 cup)
1/2 jalapeno, seeded and minced
2 cloves garlic, minced
2 green onions, sliced
1/4 cup chopped cilantro
1/2 tsp kosher salt
1/2 cup grated white cheddar
1/2 cup all purpose flour
2 eggs

Mix everything together in a mixing bowl until flour and eggs are incorporated.  If you have time, let the mix chill in the fridge for 10-15 minutes.  Over medium high heat, add 2-3 Tbsp of avocado oil to a pan.  Using a 1/3 measuring cup, scoop out corn fritter batter into pan and smash into a flat disc.  Pan fry until golden brown on both sides.

#cornrecipes #itscorn #summerrecipes #summerrecipe #sidedish #sidedishes #sidedishrecipes #easyrecipe #vegetarianrecipes #vegetarianfood #summerfood #summerfoods #bbq #jalapeno #fritters #fritter
Need to bring an appetizer to your next summer par Need to bring an appetizer to your next summer party? I’ve got you covered with this everything bagel, smoked salmon dip!  The food processor does all the work for you, so you don’t need to turn on the oven on those hot summer days.  Serve with cucumber slices for your gluten free friends ❤️

Everything Bagel Smoked Salmon Dip
8oz flaky smoked salmon
8oz block cream cheese, softened
1 lemon zested and juiced
1/2 tsp garlic powder
2 tbsp sour cream
3 tbsp minced shallot
2 tbsp minced fresh dill
1 tbsp minced fresh chives
2 tsp everything but the bagel seasoning
1 tbsp capers 

In a food processor, combine smoked salmon, cream cheese, sour cream, lemon zest and juice and garlic powder.  Pulse until creamy but with small chunks of salmon.  Should not be a mousse texture.  Scrape into a bowl and stir in shallot, dill, chives, ebtb seasoning, and capers.  Taste for seasoning and add salt if needed. 

#summerrecipes #bbqrecipes #appetizer #appetizerrecipe #easyappetizer #smokedsalmon #picnic #girldinner #gfrecipes #glutenfree #diprecipe #dip #fancywithoutthefuss
This earl grey crème brulee is a delicious twist This earl grey crème brulee is a delicious twist on a classic and it’s my go to make ahead dessert for almost all my personal chef gigs. It may sound intimidating, but I promise it’s actually really simple! Best of all, you only need a few ingredients!

Earl Grey Creme Brulee
2 3/4 cups heavy cream
1 tbsp vanilla bean paste
6 bags earl grey tea
4 egg yolks
1 wholk egg
2/3 cup white sugar
extra white sugar for the topping

Preheat your oven to 325.  In a medium saucepot, add your heavy cream and vanilla bean paste.  Heat over medium low heat until you see bubbles starting to form around the edge of the cream, but not a simmer.  Add your tea bags and remove the saucepot from the heat, stirring so that a skin doesn’t form on the cream.  Let sit for 10 minutes.  Using the back of a spoon, extract as much of the earl grey tea from the bags as possible and stir.  P

In a mixing bowl combine your sugar, egg yolks and whole egg.  Beat using high speed until the mixture turns a pale yellow color, 30-60 seconds.  Then start slowly adding in the cream mixture to the sugar, 1/2 cup at a time, so that you slowly temper the mix without curdling the eggs.  Once you have about half of the cream mix remaining, you can add it to the eggs all at once. 

Place your ramekins in a baking dish.  Fill your ramekins with the cream and egg mix almost to the top of the ramekins.  Place your baking dish in the oven.  Pour super hot water into the baking dish until it’s halfway up the sides of your ramekins.  Take care not to move the baking dish so that the water doesn’t slosh over into your ramekins.  Bake for 25-30 minutes (depends on the height of your ramekins) or until the center has a slight jiggle to it still.  This will firm up as it cools. 
Let your ramekins cool in the baking dish for 10 minutes and then transfer to a rack to fully cool. Cover with plastic wrap and chill in the refrigerator for 3-4 hours before serving. 
Sprinkle the top with an even, thin layer of white sugar and use a kitchen torch to caramelize the sugar, keeping the flame moving so it doesn’t burn. #dessert #cremebrulee #sweettooth #baking #earlgrey #easydessert #personalchef #dessertporn
This is one of my go-to dishes to bring to any pot This is one of my go-to dishes to bring to any potluck so with graduations and end of the school year parties happening, I’ve been making this pasta salad with arugula pistashio pesto and burrata on repeat. 

I promise if you make this, it will get absolutely devoured.  This homemade pesto is so easy and packs tons of flavor and adding burrata is always a good idea!

Arugula Pistachio Pesto Pasta Salad
8 cups cooked pasta like rotini
1 cup cherry tomatoes, halved
2-3 balls of burrata torn into pieces
2 cups packed arugula
1 cup roasted pistachios 
2 cloves garlic, minced
1 Tbsp lemon zest
1/4 cup lemon juice (~2 lemons)
1/2 cup grated parmesan
pinch red pepper flakes
1/2 tsp flaky sea salt or 1/4 tsp kosher salt
1 cup spinach (if it’s too brown looking)
6T extra virgin olive oil

Arugula Pistachio Pesto Pasta Salad
8 cups cooked pasta like rotini
1 cup cherry tomatoes, halved
2-3 balls of burrata torn into pieces
2 cups packed arugula
1 cup roasted pistachios 
2 cloves garlic, minced
1 Tbsp lemon zest
1/4 cup lemon juice (~2 lemons)
1/2 cup grated parmesan
pinch red pepper flakes
1/2 tsp flaky sea salt or 1/4 tsp kosher salt
1 cup spinach
6T extra virgin olive oil

Combine the arugula, pustachios, garlic, lemon zest, lemon juice, parm, red peoper flakes, and salt in a food processor and pulse a few times to combine.  Drizzle in the olive oil with the motor running.  If it looks a little brown from the pistachios you can add a cup of spinach and blend until smooth-ish.  Toss with your cooked pasta and cherry tomatoes. Top with torn burrata and extra arugula. Drizzle with evoo and top with cracked black pepper and flaky salt.

#pastasalad #potluck #summersalad #pesto #arugula #pistachio #pestopasta #pastaporn #burrata #summerdinner #entertaining #bbqdish #sidedishrecipe #sidedish
No dinner plans? No problem! Lean on some pantry s No dinner plans? No problem! Lean on some pantry staples and whip up these easy tuna fritters with lemon dill sauce for a flavorful and filling weeknight dinner! 

Tuna Fritters
1 can tuna, drained well
1 tbsp finely chopped celery
1 tbsp finely chopped shallot
1 tbsp fresh chives, minced
2 tsp fresh dill, minced
1 egg
1/4 cup grated parmesan
1 tbsp mayo
1 tsp lemon zest
1 tsp fresh lemon juice
2-3 tbsp panko
1/4 tsp garlic powder
pinch red pepper flakes
big pinch sea salt

Mix all the ingredients together in a big bowl.  Ideally chill in the fridge for 30 minutes if you have time.  If the mix is too wet, add another tablespoon of panko until you can form a patty that will keep it’s shape.  Heat a non stick skillet over medium high heat and add 2 tbsp avocado oil.  Fry each side of the patties for 4-5 minutes or until golden brown.  Makes 4 patties, serves 2.

#tuna #weeknightdinner #pescatarian #easydinner #easyrecipes #healthyrecipes #fritter #whatsfordinnertonight #itswhatsfordinner #dinnertonight #tunafish
Load More... Follow on Instagram

Don't Miss These!

meal prepped ingredients in glass containers

Healthy Summer Meal Prep

overhead photo of salmon crusted with pistachio and roasted green beans

Salmon with Pistachio Crust

close up image of three red beets

How to Cook Beets and 3 Ways to Use Them

Summer Grain Bowl with Lemon Basil Vinaigrette

Categories

  • Appetizers
  • Breakfast
  • Dessert
  • Dinner
  • Drinks
  • Lunch
  • Salads and Sides
  • Sauces & Dips
  • Snacks
  • Vegetarian
  • Weekly Batch Cooking

Recent Posts

  • Furikake Salmon
  • Tropical Overnight Oats with Frozen Fruit
  • Sun Dried Tomato Pasta Chicken
  • Smoked Salmon Frittata
  • Blood Orange Yogurt Loaf

Most Popular Recipes

closeup image of bowl filled with romesco pasta salad

Romesco Pasta Salad Recipe

White cast iron pan with smoked salmon fritatta.

Smoked Salmon Frittata

Footer

↑ back to top

About

  • Privacy Policy
  • Disclaimer
  • Terms & Conditions
  • Accessibility Policy

Newsletter

  • Sign Up! for emails and updates

Contact

  • Contact

Copyright © 2020 Brunch Pro on the Brunch Pro Theme